An email campaign is a single message you send to a chosen group of contacts; a newsletter, a promotion, or an announcement. This guide takes you step by step through creating a campaign from start to finish, and flags the mistakes that most often keep a first campaign out of the inbox.
Before you start
Make sure you have:
- At least one contact list to send the campaign to. If you don't have one, see How to Upload a Contact List.
- A verified sending domain, so your emails authenticate correctly and reach the inbox. See How to Add and Verify Your Domain.
Step 1: Start a new email campaign
From the Dashboard, open Campaigns, then select Email as the sending channel.
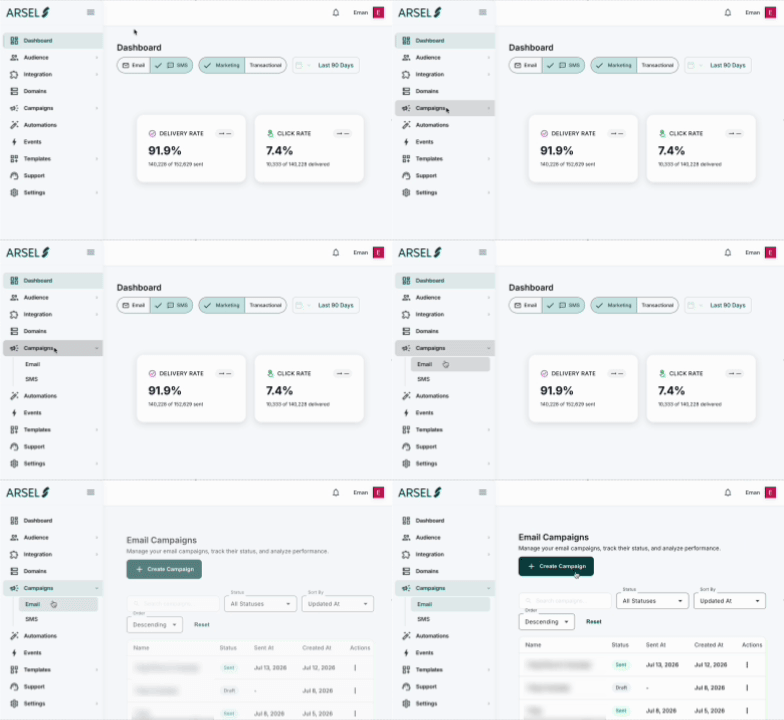
Choose Create Campaign.
Step 2: Design the email
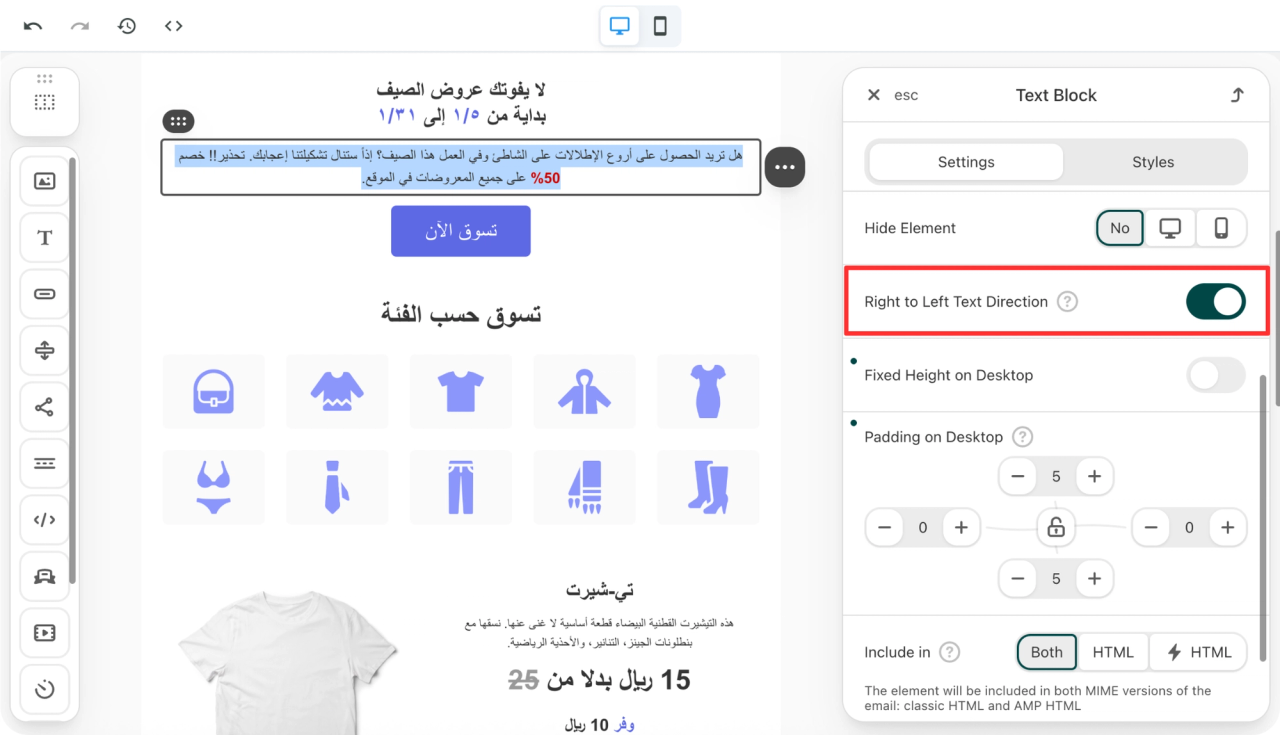
Build your email in the editor. Choose a ready template for an easier start, or begin from a blank page. Add your content, images, and buttons, and use properties to personalize the message, for example, greeting each contact by first name. See What Are Properties and How to Use Them.
Because Arsel is built for Arabic, check as you design that your layout reads correctly right-to-left (RTL).
Step 3: Set the email details
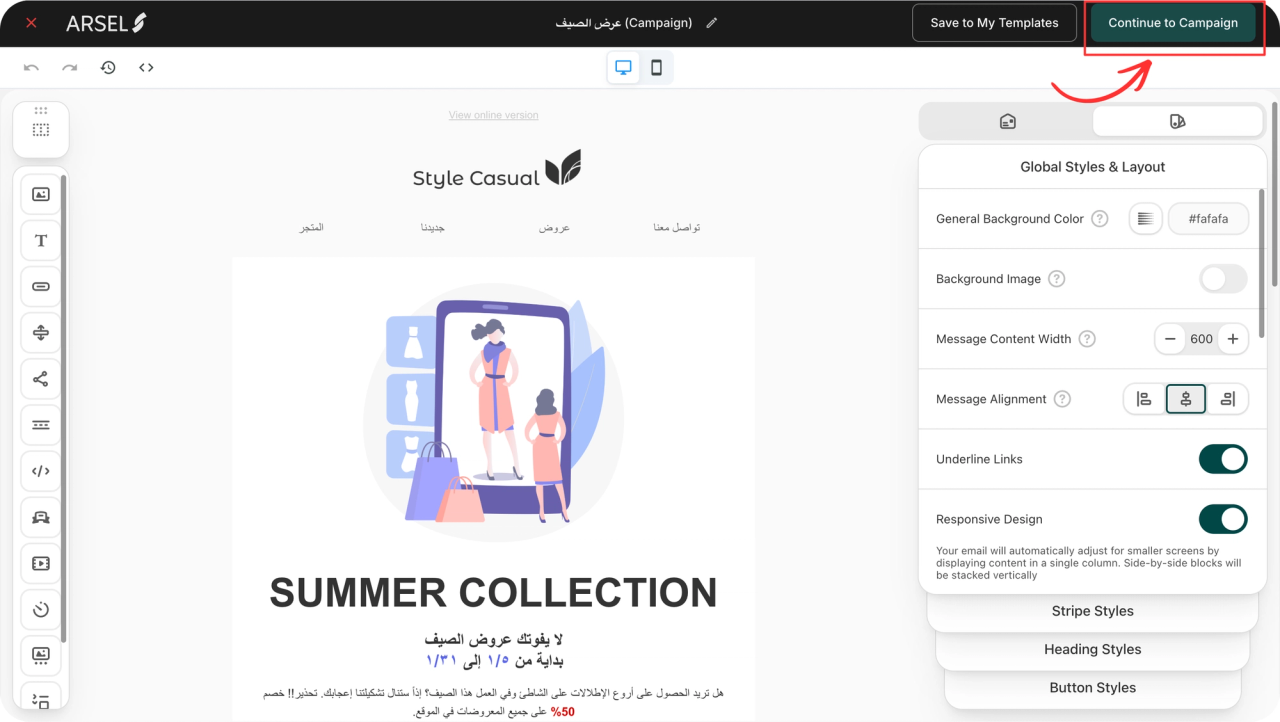
After clicking Continue to campaign, fill in the fields that shape how your email appears in the inbox:
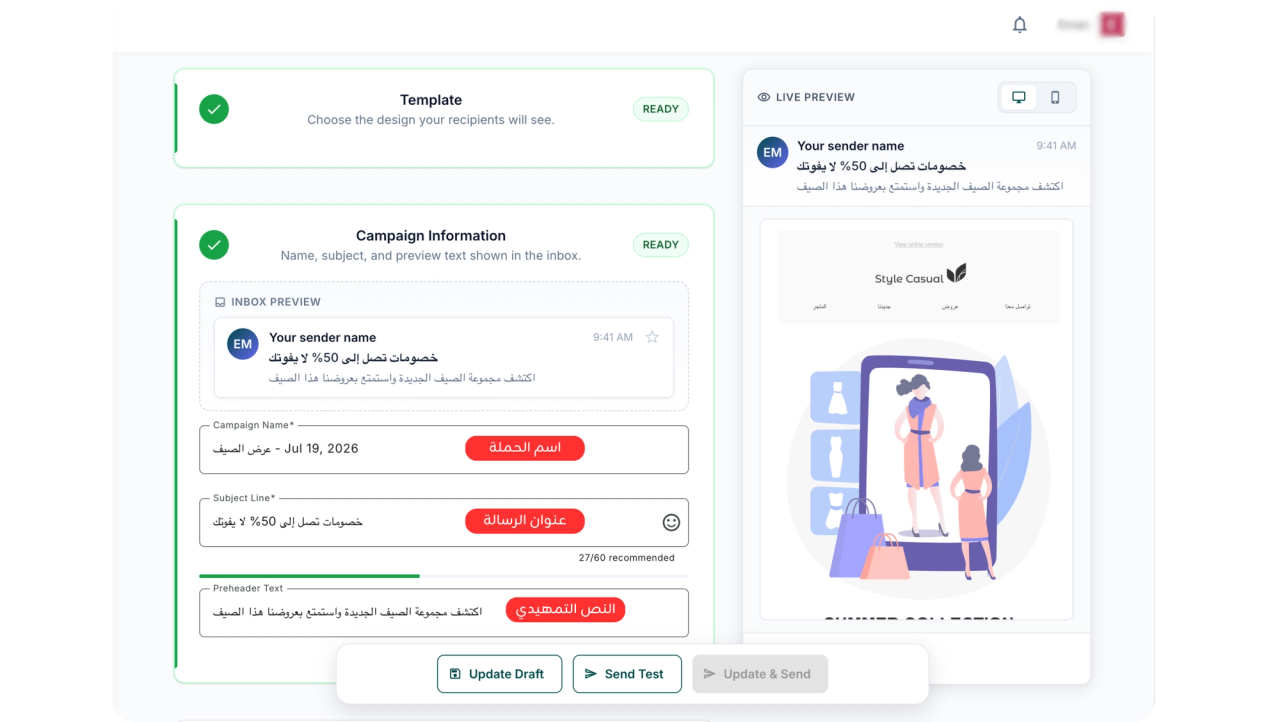
- Campaign name: Give the campaign an internal name (for example, "October Newsletter"). This name is visible only to you and isn't shown to recipients.
- Subject line: The first thing that prompts a recipient to open the email. Keep it clear and concise.
- Preheader: The short line shown after the subject line in most inboxes.
- From name: the name recipients see (usually your brand name).
- From address: an address on your verified domain.
- Reply-to: where recipients' replies go.

Step 4: Choose the campaign's recipient list
Select the list you want to send to. To reach a more precise group instead of the whole list, you can use a segment — for example, contacts who opened an email in the last 30 days, or customers in a specific city.

Targeting the right people is one of the biggest levers on your results. Learn more in How to Use the Segment Builder and What Are Tags and How to Use Them.
Step 5: Preview and test
Before sending, always send a test email (Send Test) to yourself and a colleague. Open it on both desktop and mobile, and confirm that the right-to-left layout displays correctly, that every link works, and that all images are in their correct places in the email.

Step 6: Schedule or send now
Choose to send immediately, or schedule for a specific date and time.
Before you send, Arsel shows you a "Ready to Send?" screen — a quick checklist that reassures you everything is in place. Review it top to bottom; next to each item is an "Edit" button if you need to change something.
The checklist verifies six things, with a counter at the top confirming they all passed (for example, 6 of 6 — 100%):
- Recipients: the list or segment the campaign will reach, with the estimated number of recipients.
- Subject line & preheader: the first thing the recipient sees in their inbox.
- From & replies: the sender name and address, and the address replies go to.
- Content: the template used in the email, with a plain-text version generated automatically.
- Unsubscribe link: confirms it's present in the email — an essential condition for your deliverability and for respecting the recipient.
- Tracking: opens, clicks, and conversions are tracked automatically so you can measure your results later.
At the bottom of the screen, the send time appears if you've scheduled the campaign (for example, "Scheduled for Wednesday, July 29, 2026 at 12:00 PM"). Make sure every item is green, then send or confirm the schedule with confidence.

Step 7: Review your results
After sending, open the campaign report to track open, click, bounce, and unsubscribe rates. These numbers reveal what worked and help you keep your list healthy over time.
Common mistakes to avoid
- Sending from an unverified domain. Your emails may be rejected or sent to spam. Verify your domain first, see How to Add and Verify Your Domain.
- Skipping the test email. Any broken link or misaligned right-to-left layout reaches every recipient if you don't catch it first.
- Sending every campaign to the entire list. Emailing unengaged contacts hurts your deliverability. Use segments and keep your list clean, see Email List Hygiene Best Practices.
- A vague or misleading subject line. It costs you lower open rates and can trigger spam complaints.
- Forgetting personalization fallbacks. An empty "Hi ," looks careless. Set default values for your properties.
- Making it hard to unsubscribe. A clear unsubscribe link protects your sender reputation. When leaving is hard, people click "report spam" instead.
Next steps
- How to Upload a Contact List
- How to Use the Editor to Build Your Email
- How to Use the Segment Builder
- What Are Properties and How to Use Them
- Email List Hygiene Best Practices
- How to Create an SMS Campaign